

You're ready to label a new planting, but the nursery names don't match the site register, the cheap plastic stakes are already curling, and nobody knows which plants came from which delivery. Ordering better-looking tags won't fix that on its own.
Plant identification tags need to preserve a connection between the plant, its identity and its history. Specify them as traceability records that should remain useful even after a plant dies, moves or receives a revised identification.
Tag Sizes and Formats to Specify First
The Australian National Botanic Gardens living collections guide provides these working formats: aluminium tags measuring 115 mm by 22 mm, approximately 0.5 mm thick; vertical stakes 400 mm by 25 mm; rockery labels 100 mm by 65 mm; and large labels 300 mm by 150 mm, with the latter formats 3 mm thick.
Plant label formats and where they fit
| Format | Dimensions | Thickness | Best setting | Fields it can carry |
|---|---|---|---|---|
| Aluminium tag | 115 mm by 22 mm | About 0.5 mm | Pots, trays, small collection plants | Scientific name, family, propagation number |
| Vertical stake label | 400 mm by 25 mm | 3 mm | Ground beds and open planting | Scientific name, common name, family, distribution map |
| Rockery label | 100 mm by 65 mm | 3 mm | Rockeries and low plantings | Scientific name, common name, propagation number |
| Large label | 300 mm by 150 mm | 3 mm | Display boards and feature plantings | Scientific name, common name, family, distribution map, stocktake information |
The dimensions above are the Gardens' formats; the settings and field allocations are practical starting points for your layout. Its aluminium tags are computer-generated and embossed, which is a different production method from laser marking.
Choose the information area before the finish
Start with the fields you must carry. A short scientific name and accession number need less space than a family name, common name and distribution map. Don't squeeze everything onto a narrow strip just because it costs less per blank.
Check the normal viewing position next. A nursery worker lifting a tray can read a compact tag closely; someone standing beside a public garden bed needs larger lettering and a clear approach.
Then decide what supports the tag. Soil needs a purpose-made stake, while a pot, bracket or display board can support a thin plate. A narrow aluminium tag bends when someone tries to force it into compacted ground, regardless of how well its lettering was marked.
Match the format to the task
For a rehabilitation planting beside an industrial compound, separate the public-facing plant name from the detailed maintenance record. A readable stake can identify the plant while a compact record identifier connects it to the register.
For a low rockery near a pedestrian route, use a broad, low-mounted face rather than a tall stake that catches boots or maintenance equipment. Keep the text area clear of mulch and irrigation splash.
Specification rule: Write the field count and mounting surface first, then choose the format.
What Every Plant Tag Must Record
A name-only tag becomes unreliable when someone moves the plant or revises its identification. Without a stable record number, the next person can't establish whether the tag belongs to that specimen or its neighbour.
The Australian National Herbarium's specimen-label guidance treats the identifier and identification date as reliability controls. Capture the identification trail in the register, then decide which parts must remain physically readable.
- Accepted scientific name and family. Use the accepted name rather than copying an abbreviated nursery description. Retain previous determinations in the record instead of overwriting the history.
- Record the identifier's name and identification date. A determination made by a qualified botanist isn't interchangeable with an unverified delivery label.
- Assign a unique collector, specimen or accession number. Keep it stable when the displayed name changes.
- Record the collection context: collection date, precise locality, latitude, longitude and geodetic datum. Coordinates without their reference system can create uncertainty during later verification.
- Capture habitat, soil or geology, vegetation community, growth habit and abundance where relevant. Include diagnostic flower, fruit, bark or leaf features that help someone check the identification.
- Connect the physical and digital records. Include a readable accession number, with a barcode or QR code where useful.
Divide the face from the record
The front normally needs the scientific name, family and a short common name. Use family capitals, an initial capital for the genus and lowercase for the species; keep cultivar and infraspecific information where it's needed to distinguish the plant.
Put the stable record number on the front or reverse. A QR code can open the fuller record, but don't make scanning the only way to identify the plant. Connectivity, account access and damaged code modules can all interrupt access; engraved text remains usable offline.
Preserve uncertainty rather than hiding it
Say a row of Eucalyptus runs along a substation fence. Each tag should identify the species and point to a record containing the planting date, source and maintenance location, rather than treating the whole row as interchangeable.
If the identification is uncertain, record that status and arrange an expert determination before producing permanent species-level tags. For suspected weeds, retain relevant synonyms in the record so staff can reconcile older names with current reporting systems.
A replacement plant gets its own identity. Don't quietly transfer the removed plant's accession number to its replacement.
Materials and Marking Methods That Last Outdoors
Choose the substrate and marking method together. A durable plate with an unsuitable surface mark can become unreadable while the plate itself still looks sound.
Material and marking method by outdoor life
| Material | Marking method | Typical outdoor life | Best for |
|---|---|---|---|
| Anodised aluminium | Laser engraving can remove the anodic layer to expose metal | Specify an exterior-grade finish and validate the marked sample | Outdoor plant tags, asset tags, switchboards |
| Brass | Deep engraving with paint fill | Good indoors; tarnishes outdoors | Heritage plaques and indoor collections |
| UV-stabilised polymer | Laser engraving or UV print | Use the product's exterior rating; test the actual marking system | Nursery tags and short-term labels |
| Vinyl label | Digital cut or print | Treat as temporary unless the film and adhesive are exposure-rated | Temporary trial beds and indoor trays |
There's no defensible universal lifespan for these materials without knowing the finish, exposure and marking process. A sheltered greenhouse and a salt-exposed coastal planting aren't equivalent service conditions.
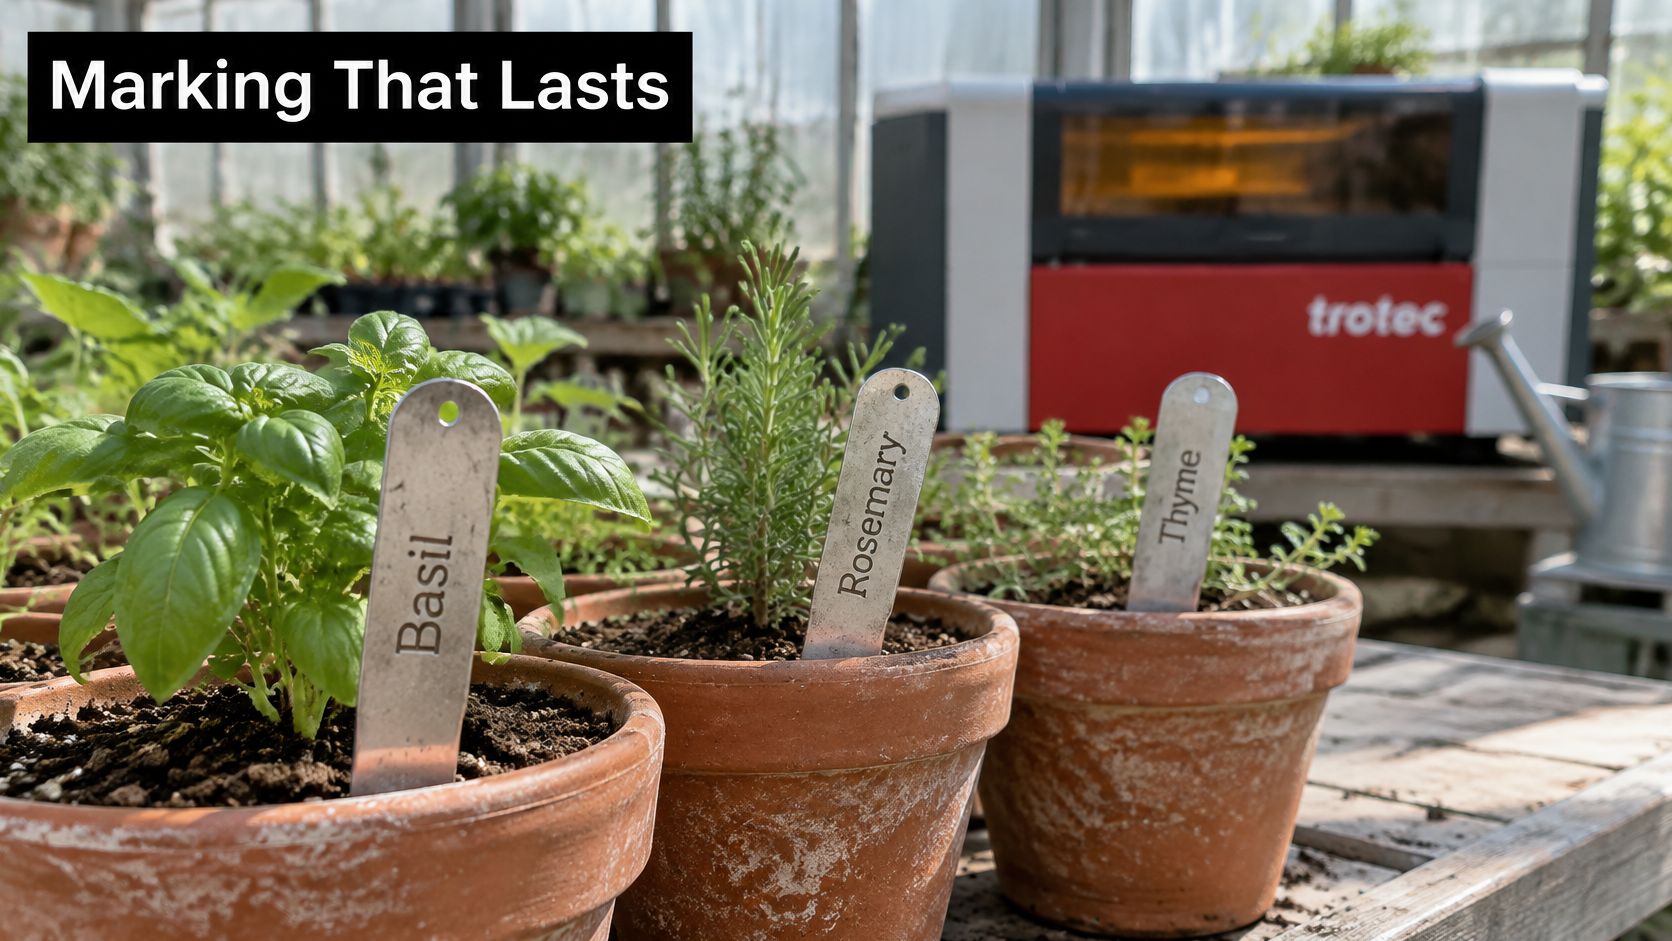
The greenhouse arrangement below shows the compact metal-tag format beside laser equipment.
Understand what the laser changes
On anodised aluminium, laser processing can bleach the dye or remove part of the surface coating, depending on the system and settings. Don't assume every pale mark exposes bare metal. The distinction matters because removing the protective finish changes how the marked area handles exposure.
Fibre laser annealing can produce a dark oxide mark on stainless steel without cutting a recess. However, it doesn't automatically guarantee unchanged corrosion resistance. Confirm the marking process and any required post-treatment for the intended environment.
Trotec Laser fibre and CO2 systems are relevant equipment choices, but they aren't interchangeable. Match the wavelength, material and marking mechanism, then test power, speed, focus and pass strategy on an offcut before committing the batch.
Choose for exposure, not showroom appearance
Deep engraving with paint fill suits heritage brass plaques because the recessed lettering remains defined when the surrounding brass develops a patina. The paint still needs maintenance, especially where cleaners or irrigation attack it.
UV printing gives flexible colour layouts, while cut vinyl suits changing trial-bed information. Neither should be treated as equivalent to an integral metal mark where regular abrasion or long exposure is expected.
For coastal sites, start with marine-grade stainless steel or suitable anodised aluminium, then examine the fixings and exposed edges. Indoor nursery trays can often use laser-compatible polymer; never put unidentified plastics into a laser, particularly PVC.
We can advise on material suitability before artwork is finalised. The laser marking materials guide helps frame that selection around the substrate rather than appearance alone.
Exposure check: Choose metal for demanding permanent identification, polymer or vinyl for controlled short-term use, and judge every marked sample under the actual site lighting.
How to Produce Tags From Artwork to Finished Tag
A good batch starts with controlled records, not the engraver's start button. Keep the approved artwork, material description and production settings together so a replacement tag can match the original.
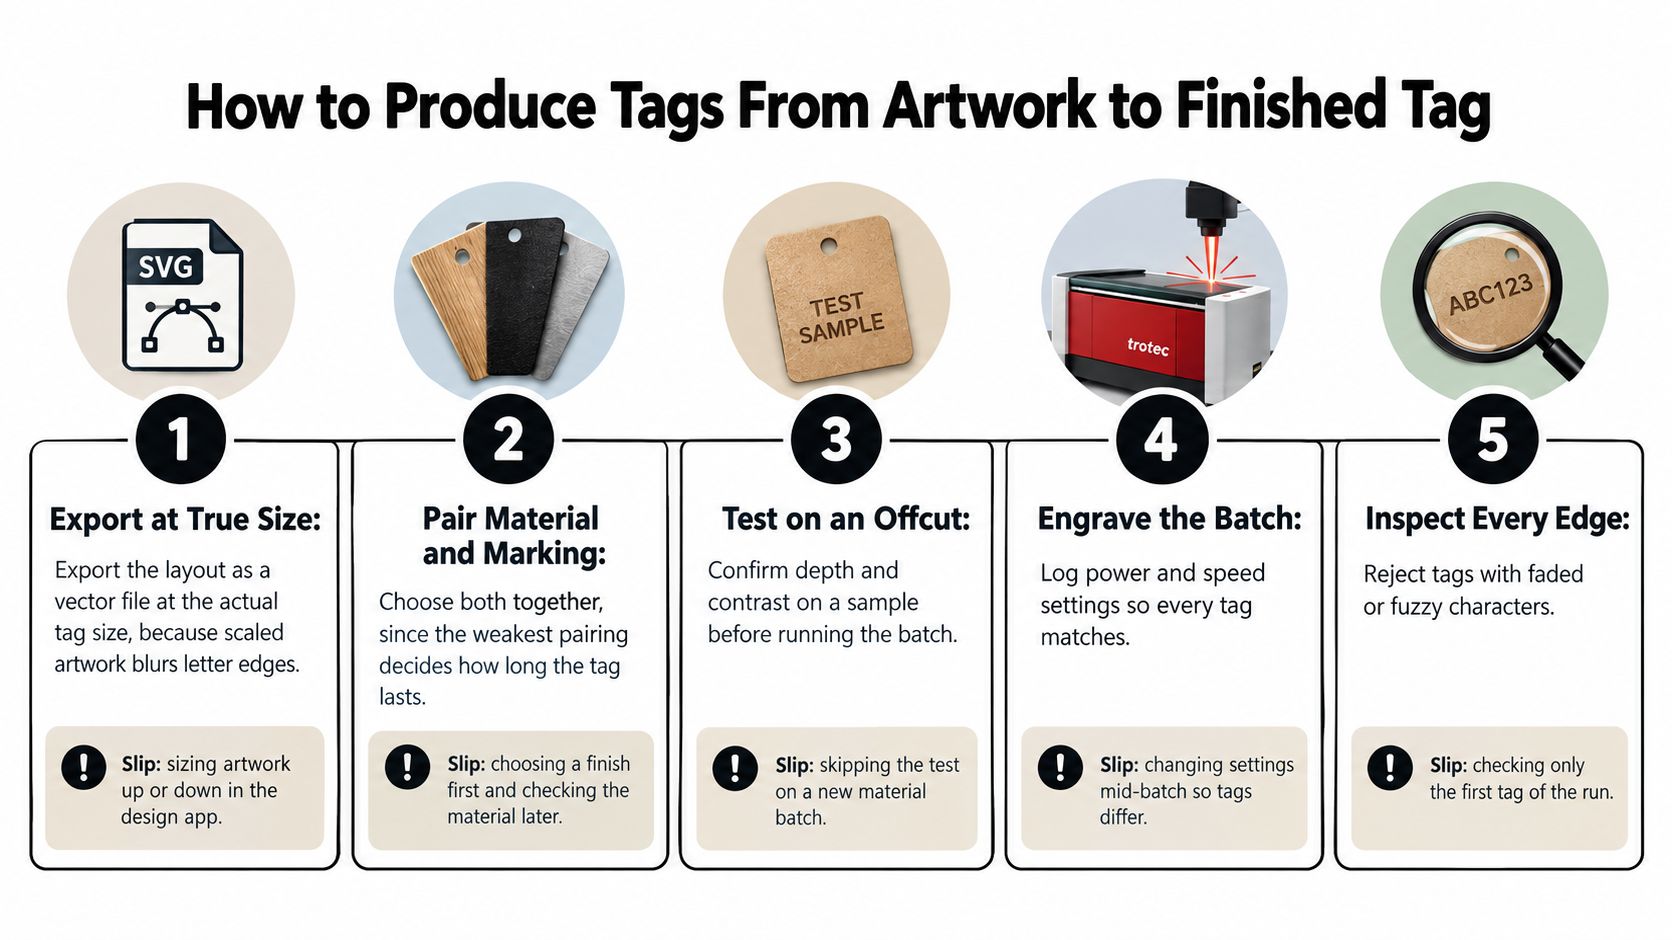
The process graphic summarises the main production stages.
Prepare the file and prove the mark
Export at actual size. Use a vector file such as PDF, SVG or the production software's supported vector format. Scaling doesn't blur vector lettering on its own, but uncontrolled resizing changes text size, spacing and hole clearances; embedded raster artwork can also lose definition.
Check the text against the approved plant-name register. Preserve botanical formatting and inspect long names, infraspecific ranks and accession numbers individually, because automated text substitution can push them outside the usable face.
Set lettering from the viewing task. Print a full-size proof and place it where the tag will sit. Small lettering that looks crisp on a monitor can disappear when the reader stands above a garden stake.
Choose contrast deliberately. Dark-on-light usually suits a conventional reading layout, while light-on-dark can work well on anodised aluminium. Avoid decorative fine strokes that disappear in glare or collect dirt.
Test an offcut from the production batch. Use the intended focus, fixture and artwork, then inspect the result under site lighting. Check the smallest characters and code modules rather than approving only the large heading.
Control production and inspection
Engrave the batch on the appropriately configured Trotec Laser machine. Record the tested power, speed and other relevant settings; excessive heat can distort thin stock, while an aggressive removal pass can damage the coating or substrate.
Inspect every tag. Look for fuzzy strokes, missing characters, inconsistent contrast, sharp edges and burrs around fixing holes. For recessed engraving, check depth consistency; for surface marking, judge the mark rather than expecting a cut recess.
Assign or confirm the record number and log the tag before dispatch. Reconcile the physical tag against its register entry, not merely against the neighbouring tags in the production tray.
Say a switchboard upgrade needs a hypothetical 40-tag run alongside plant identification work. If inspection catches a transposed identifier before packing, the correction prevents an otherwise well-made tag from being installed against the wrong record.
Use separate trays for accepted, rejected and awaiting-verification tags. A rejected tag left beside approved stock can easily return to the job during packing.
A batch passes when the contrast is even, the edges are safe and every identifier matches the register line for line.
How to Mount Tags So They Stay Readable
Start with the stake, because correct artwork won't rescue a label buried in mulch. The ANBG plant-label policy requires the lower 150 mm to remain blank and the stake to be positioned at 45 degrees for insertion into the ground.
Mounting method by surface
| Surface | Fixing | Watch for |
|---|---|---|
| Garden bed soil | Angled stake with the lower section blank | Mower contact or loosening in wet clay |
| Shrub stem | UV-rated cable tie, loose enough for growth | Stem constriction if it isn't checked during growth |
| Aluminium asset tag on steel | Stainless steel screws or rivets with suitable isolation | Galvanic corrosion where dissimilar metals stay wet |
| Switchboard or panel face | Compatible adhesive on a cleaned, degreased surface | Lifting in heat or where dust remains |
| Rockery | Stainless wire or suitable adhesive, using a rockery label format | Unsuitable wire rusting or adhesive losing grip |
| Pot or tray | Clip or wire through a suitable drainage hole | Abrasion during watering and handling |
Fit without damaging the tag or plant
Make a pilot opening in hard ground instead of driving a brittle stake against stones. Insert by hand where possible; use a light mallet and protective block only when the stake material permits it, and never hammer the printed face.
A stem-mounted tie needs slack and a scheduled growth check. Prefer a separate stake for long-term identification, particularly on young trees, rather than relying on someone remembering to loosen a loop around living tissue.
Stainless fixings aren't a complete answer to corrosion. Aluminium, stainless steel and a steel support can still form a dissimilar-metal assembly, so use appropriate isolating washers, coatings or sleeves and avoid moisture traps.
Place for readers and maintenance crews
For adhesive-mounted tags, remove dust, oil and cleaning residue with a surface-compatible cleaner. Let the surface dry, use the adhesive's specified application conditions and keep pressure on the full bond area.
Position upright panel tags near the normal viewing height. Garden labels belong where readers naturally look down towards the planting, clear of canopy growth, irrigation spray and mower or vehicle paths.
For a hypothetical stake repeatedly disturbed by mowing, moving it 300 mm back from the edge and angling its face away from the blade path may solve the placement problem. Confirm the maintenance envelope rather than treating that example distance as a universal clearance.
The outdoor equipment labels guide is useful when the same site includes exposed equipment and plant records. Finish with a walk-round from the normal approach direction and check that each tag clearly belongs to the intended plant or asset.
Safety and Compliance Rules for Industrial Sites
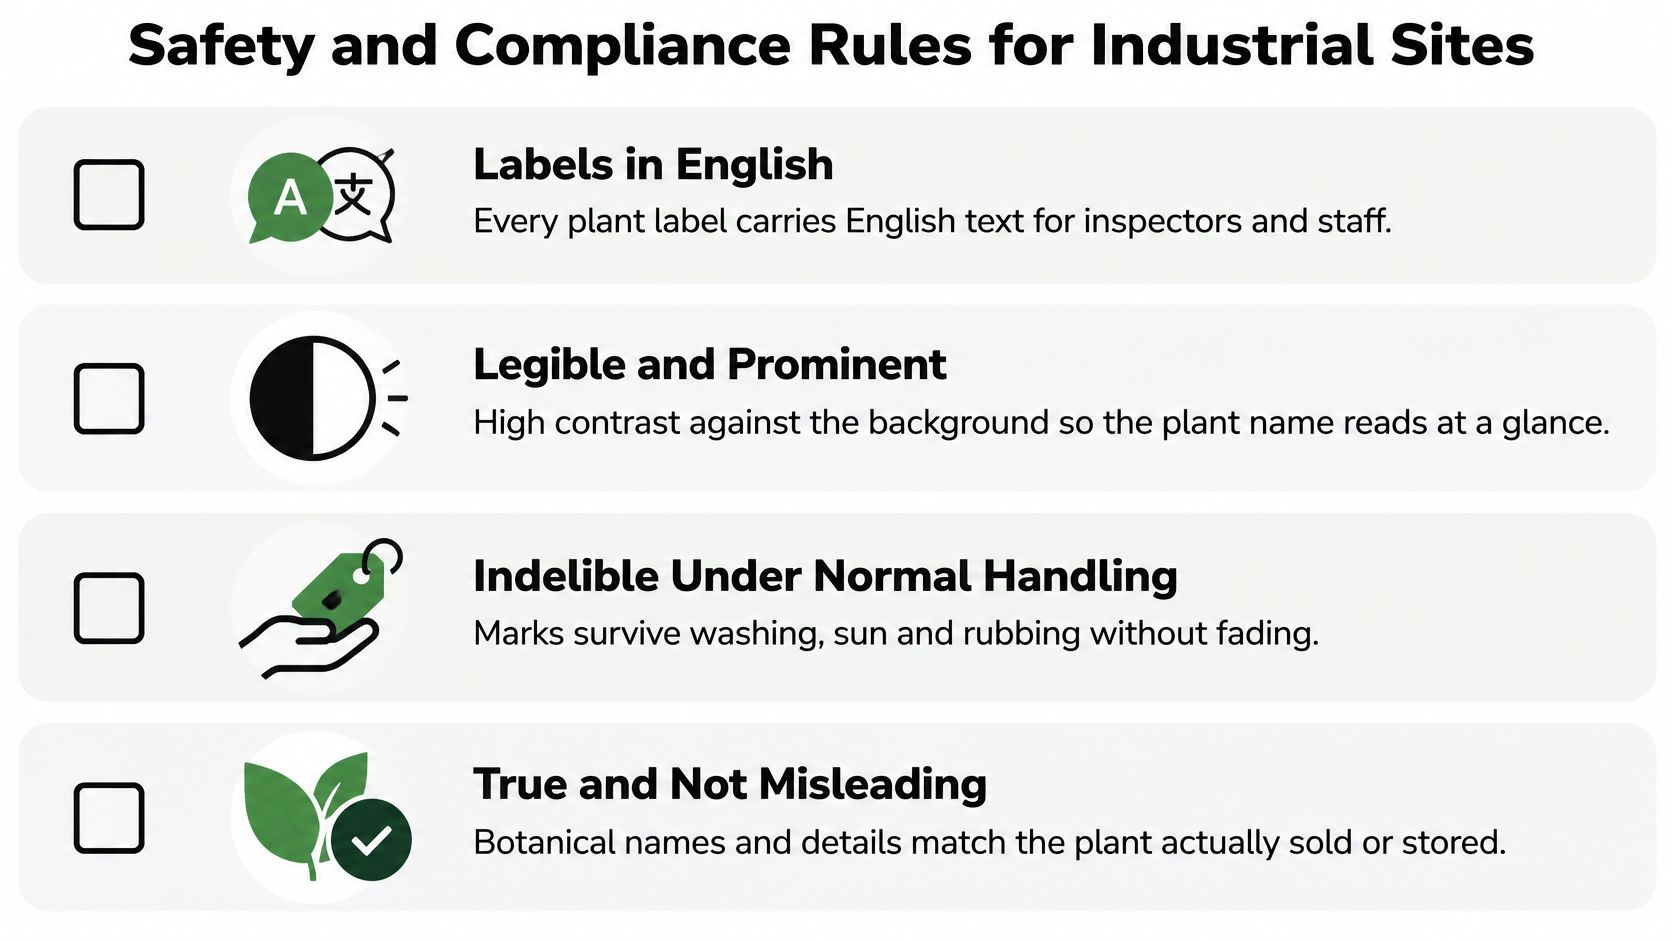
Australia's National Plant Labelling Guidelines call for English text, prominent and legible contrast, indelible marking under normal conditions, and information that is true and not misleading. They also specify italicised botanical names, with a capitalised genus and lowercase species.
These are plant-labelling guidelines, not a blanket certification for industrial installations. A neat botanical label can still create a site problem if it obscures an isolation warning or introduces a sharp projection into a walkway.
The checklist graphic captures the basic plant-label requirements.
Keep identification separate from safety instructions
Match asset identifiers to the site register and use the site's approved safety-sign conventions. AS 1319 covers safety signs for the occupational environment, including colour and shape conventions; don't improvise a warning design by adding a decorative symbol to a plant tag.
Electrical equipment labels also need to fit the installation's applicable wiring rules and electrical safety procedures. Don't drill a switchboard enclosure or attach labels near live equipment without the required authorisation and safe access arrangements.
Use a dedicated warning where necessary rather than expecting a botanical name to communicate a hazard. The industrial safety signs guide helps distinguish identification from the safety communication around it.
Add biosecurity context and verify durability
Queensland's Weed Spotters Network includes 1,800 trained citizen scientists, according to the weed-surveillance conference paper. For a prohibited or restricted plant, confirm the applicable jurisdiction and carry the accepted name, relevant synonyms and a clear status warning so a photograph can be matched to the correct record.
Request UV-weathering and salt-spray evidence for the actual material-and-marking combination. An unmarked sheet's test result doesn't establish how the finished tag, filled lettering or adhesive will behave.
Schedule an inspection at 12 months as a practical maintenance checkpoint, with earlier checks in aggressive conditions. Replace unreadable or lifting tags and investigate the failure before repeating the same specification.
- Identification passes when the tag matches both the plant and register.
- Readability passes when staff can read it from the intended approach.
- Physical safety passes when edges are safe and tags stay outside traffic paths.
- Attachment passes when fixings remain secure without restricting plant growth.
- Traceability passes when the record number is present and the corresponding record is accessible.
Confirm Your Tag Specification Before You Order
Turn the decisions into a single production specification. A photograph of a similar tag helps explain appearance, but it doesn't define the material, record structure or fixing.
Send a complete job pack
- Format and dimensions: Select the shape, usable text area, thickness and hole positions.
- Exact text: Supply approved wording for every tag, including botanical formatting and determination status.
- Numbered register: Match each identifier to its plant, location and digital record.
- Material and mark: State the substrate, finish, marking method and required contrast.
- Installation: Identify the mounting surface, fixing and environmental exposure.
- Quantity and acceptance: Give the required quantities and explain how the sample and finished batch will be checked.
If you're planning a cactus or succulent installation, The Cactus Outlet's guide to compare bulk cactus suppliers can support the procurement stage. Settle the plant list and supplier naming before releasing permanent tag artwork.
Check the sample before production
We can mark on almost any material and advise on material selection for engraving and marking projects. Our work includes asset labels, safety signage, steel plaques, panels, switch plates and electrical switchboards, so the specification can address both planting records and associated site identification.
For the next step, visit evright.com with the job pack. In laser marking, the approved artwork controls a beam that alters or removes the surface to create a lasting contrast mark; the chosen material and process determine the result.
Send the completed specification, request a test piece on the chosen material, and approve it under site lighting before the full run.
Evright Industrial offers engraving and marking for durable identification, with material advice to help match plant tags to their exposure and mounting conditions. Visit Evright Industrial to discuss your tag register, artwork and sample requirements before production.
Recent Comments